The finished mini theatre (see earlier post) finally arrived in Canada, here what it looks like:

This snapshot really doesn’t do it justice, more details can be seen here >Mini Theatre<
Time for new adventures ![]()
The finished mini theatre (see earlier post) finally arrived in Canada, here what it looks like:
This snapshot really doesn’t do it justice, more details can be seen here >Mini Theatre<
Time for new adventures ![]()
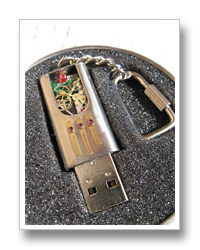
Something my sweetheart made for a special friend. She created the mini book, most of the charms and the whole necklace that carries it all ![]() .
.
Ok, I was allowed to help here and there, doesn’t it look great? Bits and pieces of New Zealand are integrated in there.
 |  |

I really like it, more are already on the ‘to do’ list. Click the pictures for a bigger preview.
by Edgar Allan Poe ….
 | another Swap run by the AFTCM group, this months theme: a mini theatre inspired by Edgar Allan Poe It took me a while to make my mind up, but look at this cover picture, THAT IS IT This time I’ll try to follow a completely different path, instead of using metal, wood, etc I challenged myself to use paper as the ‘main ingredient’. Below some pictures showing the centre piece of the stage, Scheherazade telling her Story. I tried to achieve that 3D layered paper effect they sometimes use for those flower postcards. I’m quite pleased with the result I have to admit. |
 |  |

Next will be the main stage .. soon in this theatre ![]()
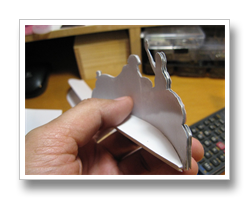
As mentioned before, most of the ‘Timeworn Techniques’ exercises are done on cardboard, but that is not my thing. My alternative … a butchered mobile phone.
The technique I tried is called ‘burned copper’, here some detail shoots.
 |  | |
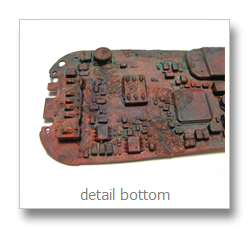 |  | |
It’s not finished yet. More washes are required to tie it all together and the final varnish, but I’m quite happy with the outcome so far. I have to admit, the results some of the other participants achieved are far more impressive. Keep the fun up ![]()
 |    |
over and over again. Knew it was time he’d made up his mind, to leave his dead life behind. Spread your wings and fly away, fly away far away |  |
Just a little time filler project on the side, my first try on creating little charms for a swap.
Stamping the copper was easy, but bending those wires … hats off to everyone who knows how to do that properly. Guess I need lots more practise to make them look even, but otherwise I’m quite happy with the outcome.

They’ll make their way around the globe soon, curious to see what I will get in return.
| The theme for last months swap was ‘Altered Egg’, here my entry: My sweetheart Ilka made the suggestion to create a bird cage, loved that idea. I immediately had the vision of a little robot sitting in there, hanging out, having a good time Is more a steam ‘punkish’ style and it looks like the movie ‘Robots’ influenced me more than I would have admitted. |  |
 | And here the one I received in return. Just gorgeous, completely different style. That’s what I like about those swaps, you never know what you will get. I got it from Karen C. (forgot to ask her if it is ok to post her name). I love the vintage look of it and the details, have a look here:  Yes, Gears, I love that detail. Thanks again to Karen for this wonderful job. |
I made this one for my daughter Ronja, I hope she will enjoy it as much as I enjoyed making it for her. Looks similar to the one I made for Chris, just a different tin this time.

Close ups:
 |  |
 |
| CRC spray to the rescue to remove those rusty screws |
 |
| taken apart |


 |
| even the lamp did not get away |


 |
| a present for me :) Happy Valentines to all of you ~Rainer |
 |
| 'Raw' paper mask from Geoff's Emporium |
 |
| Mask is sealed with black Gesso. After that I added a cardboard tube for the eye piece (guess where that one came from) |
 |
| Eye piece covered with golden colored aluminium foil. |
 |
| After that I applied the leather and the stamps |
 |
| The inside of the eye piece. Same foil, embossed with a cuttlebug. The outside is textured with a toothpick, just random grooves. |
 |
| The rim, cuttlebug again and some more foil. |
 |
| Now the trick, to 'age' it I used ... *drumroll* BLACK LEATHER SHOE DYE Works perfect on foil. I also use it on plastic and wood. |
 |
| From here onward it was more or less 'the usual'. Stamping, adding ribbons, glitter stuff, etc. |